More Wild Country Zephyros 1 Musings

Following on from my rave review, subsequent pole failure, and adventure with Terra Nova customer services, I took my Wild Country Zephyros 1 tent away to Leicestershire for the weekend with the Backpackers Club. With some trepidation that it might not be as reliable or comfortable as I need a tent to be after a long hike.

I’m pleased to report that I’ve fallen in love with this tent all over again. It was reliable, comfortable, and I found a new feature!

We had a big rumble of thunder Friday night and then an almighty downpour for about 10 minutes. After that I can happily confirm my Zephyros is still absolutely watertight after 10 months of use.


Then I was reminded how cosy it is despite the small dimensions.

The inner is rectangular, about the size of a mattress, but there’s an additional triangle of space in the middle at the back. This space is large enough to store a significant amount of gear, including my rucksack, without feeling cramped. The inner sags a bit but not a great deal. The vents at the head and foot help keep it airy. The zip goes right the way down the side and can be opened up and rolled away leaving the whole porch accessible from the inner, an advantage over similar tents that have just a half sized door.

The porch initially looks small but there’s bags of storage space. A gap between the inner and outer at each end can be used for storage and the line that attaches the inner to the fly can be used as a washing line. This can all be easily accessed because the inner zip opens right up to the ends.


All this storage leaves the main porch clear, accentuating the spacious feel of this tent. All in all, rather than feeling cramped inside when the door’s zipped shut, it feels very homely.

And finally I discovered a new thing!

The Terra Nova Laser Competition, which this tent is a cheaper version of, has a neat feature where the ends of the fly can be raised for ventilation.


Now I’m not convinced the Zephyros is designed to do this, but you can vent the ends in a similar way. First unpeg the outer at each end, tuck it up inside, and attach the peg loop to the line between the inner & the outer. Ta da!


I just thought I’d try it after checking out some Laser Comps on the meet and was amazed when it worked. From inside you can see out through the head/foot vents in the inner which is neat. I’ve never had any condensation issues with the Zephyros but on a hot, still night this would be a bonus. Plus it’s useful in the morning to help everything dry off. I was so excited when I discovered it I ran around telling everyone. Sad but true.

So there you go. The Zephyros is back in my good books.

Terra Nova Customer Service

Eek. I write a glowing review for a product and almost immediately it fails to live up to my review. Shortly after writing about the Zephyros 1 I discovered a significant failure.

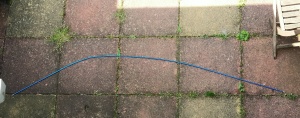
Unable to get a taut pitch as the pole wasn’t curving into a smooth shape, I found a significant bend in one section.

IMG_20140513_042227

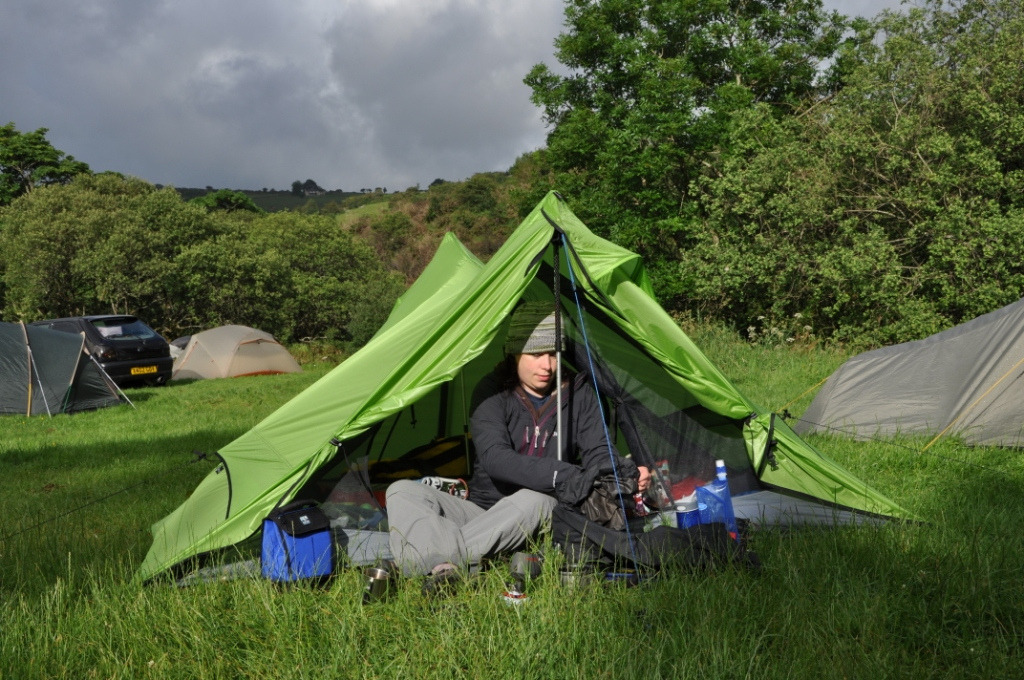
Here I need to stress that the tent hasn’t been pitched in high winds or under extreme duress. However it has always been very hard to get the pole into both outer eyelets on either side of the tent and needs brute strength. The instructions say it’s normal for the pole to take a curve over time so I wrote to Terra Nova customer services to ask if what had happened was normal and if it might potentially rectify itself over time by the rest of the pole taking a similar shape and, if not, what my options were.

Then I waited.

After a week I contacted Terra Nova via Twitter to see if they’d received my email. This bump got me a reply. No, this wasn’t normal and they would replace the pole as a ‘goodwill gesture’ if the tent was still in warranty. This seems odd to me. Surely if the product has failed under warranty it’s not a goodwill gesture to replace it? But whatever. I posted the bent pole off to Terra Nova on the 27th and it was received on the 29th. 4 working days later I received an email saying they’d received it and would get back to me as soon as possible.

A week later and I still haven’t heard anything or received a replacement pole. Now the returns paperwork declares that repairs can take up to 8 weeks but this is just a replacement pole. They’re not actually having to repair anything. If they’re out of stock then I’d expect at least an email to let me know what’s happening.

This isn’t a case of the worst customer service on record but it IS off-putting. Before this I wouldn’t have hesitated in buying or recommending their products but now I’m having doubts. Certainly the Zephyros 1 Lite is off my wish-list for now.

Saga to be continued and I’ll update this blog post as more happens. At least I have another solo backpacking tent I can use this month! Anyone else had any experience, better or worse, with Terra Nova Customer Services? I’d be interested to know if this is normal for them or for tent manufacturers in general or if it’s just a singular occurrence.


Update Monday 16th June.

The day I posted this blog post (11th June) I received an “@” reply from a friend via Twitter that cc’d in Terra Nova. Without being asked directly, the next day (12th) the person managing the company’s Twitter account contacted their Customer Services department to chase up the replacement order. Then they came back to me to ask if Customer Services had contacted me. So I have to say, excellent service from Terra Nova’s Twitter account! Timely, proactive, and professional.

The subsequent email I received from Customer Services said “As discussed in our earlier emails although the damage is not covered by our 2 year guarantee” and that a replacement pole would be sent out “asap”. I wasn’t happy with either of these statements so wrote back saying that the cause of the damage hadn’t been discussed, it hadn’t been caused by misuse/neglect/accident, and that “asap” is not a timescale. I also specified that I wasn’t happy with the service I was receiving.

I don’t know if either of the following 2 actions prompted a same day response but I’ll include them here just in case. Firstly I told the person managing Terra Nova’s Twitter account that I’d received a reply from Customer Services but that my issues hadn’t been resolved yet. Secondly I attempted to copy in the Managing Director of Terra Nova, Andy Utting, by guessing his email address.

So the same day I received a response from Terra Nova which I’ll include here…

Thank you for your e-mail. We are sorry you are disappointed with our gesture of goodwill offer.

Unfortunately the guarantee is not against any sort of failure or general degradation of materials.  We only make judgments as to whether the particular problem emanates from an original defect in materials or workmanship.

After inspecting your returned pole although we are unable to confirm how, we do conclude in our experience that at some point the pole has been bent at 2 sections due to some kind of external force/duress, this would have been quite strong to bend the sections.

However we have arranged to replace the pole at no cost as a gesture of goodwill.

and the replacement pole should be despatched today, at the latest tomorrow.

We will check this and confirm exactly for you.

If you are concerned about the tent, although we are not aware of a problem with this model you can return the tent to us for full inspection and we could pitch and check the tent in more detail for you.

Following this email I then received a follow up email confirming that the replacement pole had been posted that day! It arrived 2 days later on the Saturday (14th June).

I’ve tested the new pole today, very carefully. Honestly I think the problem is that the pole is too long for the tent, i.e. that the tent has a fault. Undue pressure has to be put on the pole to get it into the eyelets and when pitched it looks like a tauter pitch could be achieved if the pole was bent at a shallower angle.

So I’ve taken it all down and it’s sitting on the table.

I know I should post it back to Terra Nova for them to investigate. If I continue to use it, the replacement pole might be damaged the way the last one was. However, I’m loath to spend more money on this tent. I’ve already paid for postage and packaging back to Terra Nova once. Alternatively I could try and fix it myself by somehow, perhaps by lengthening the tape that runs between the eyelets underneath the tent.

Honestly at this point I just want shot of the thing. It’s really hit home how important confidence is with tents. I’m due to go backpacking soon and this is the tent I would usually take but now I’m concerned it may fail.

One last thing. I’ve had a few people tell me their Terra Nova Customer Services stories. One person said he’s had nothing but good service. However three people told me at length of their experiences and how they wouldn’t buy another tent from Terra Nova because of how poor the aftercare was. One friend saying that he’d had excellent service from Hilleburg which is why he’s now their loyal customer.

Thanks for following my Terra nova Customer Services saga. If you’d like to share your experiences with them or any other manufacturers or have any comments please share them below.


My Backpacking Gear May 2014

I’ve written this blog post because… everyone else is doing it!

Osprey Exos 46 backpack.

Backpack:

I’m currently using an Osprey Exos 46 to carry my gear. The Exos has been updated this year and I picked up this, older version, in a sale. I actually prefer it as there’s plenty of room for all my gear and the newer version has a capacity of 48 litres rather than 46 and hence is heavier. The large number of outside pockets makes grabbing things on the run nice and easy. I keep my waterproofs, the tent, a drinks bottle, snacks, cash, and first kit all on the outside of my bag so that the gear I don’t use during the day is safely tucked away in a waterproof liner in the main compartment and doesn’t get disturbed.

It’s not the lightest backpack on the market (I have the “S” back size and it weighs just over 1Kg) but it does have a solid frame and is of the build quality you’d expect from a company like Osprey. Besides 1Kg is a very reasonable weight. (You’ll notice this is a running theme with my gear: not the lightest but still, reasonably light.) Osprey don’t make a women’s specific version of the Exos but I’ve found this unisex version very comfortable. Some people criticise Osprey for adding too many features which raise the weight unnecessarily. In the Exos I quite like the gimmicks. You can get a drinks bottle out of the side pocket and stow your trekking poles without stopping.

One thing I’ve noticed to be a particularly British trait is to keep the tent on the outside of the bag. This enables pitching in the rain before opening up your rucksack and packing everything away inside the tent on a rainy morning, minimising gear getting wet and/or dropped in mud. It’s a mystery why Brits in particular would be mindful of this. I keep the tent pegs in an outside pocket, the poles in the side pocket, and the tent itself attached to the bottom of the rucksack.

There’s one waterproof liner in the main compartment, a Exped 40L Folding Ultralite Drybag, and some smaller waterproof bags in the outside pockets.

Wild Country Zephyros 1 tent.

Tent:

*** This tent had a failure! Please read blog post Terra Nova Customer Service ***

I wrote about it in my last blog post and here it is again, the Wild Country Zephyros 1. I’ve done some research and can’t find a better deal on a reasonably light solo 3-season tent. I’d like to replace mine with the updated, lighter version but for now it does the trick. My set-up weighs about 1.5Kg including pegs, poles, and bag. (The new version is approx. 300g lighter.)

I don’t bother with a groundsheet. The tent was so cheap and the floor so tough I don’t worry about putting a hole in it, I can always patch it if I do.

Top Row: Toakes Ultralite Solid Fuel Ti Cook System (stove, mug, windshield (not shown), Thermarest NeoAir Xlite Women’s Mattress. Middle Row: Sawyer Mini Water Filter, Headphones, Titanium Folding Spork, 2 x 12″ Nite Ize Gear Ties, Swiss Army Knife, Petzl e+lite Headtorch. Bottom Row: Decathlon Inflatable Pillow, Platypus 500ml Water bottle.

Stove:

Experts say that there are 3 big items you should focus on to reduce the weight you’re carrying. Firstly the backpack itself, secondly the tent, and thirdly the stove. In this third category I’m doing pretty well. My favourite stove is a titanium solid fuel stove, a titanium mug, and a titanium windshield weighing in total about 100g. (Pictured above top left.) It’s made by Toakes and sold as the “Ultralite Solid Fuel Ti Cook System” and it comes with a titanium folding spork and some little bags to keep everything in. It’s only good when I’m solo backpacking due to the size of the mug/pot but it’s a lovely little set-up.

Mountain Equipment Xero 550 down sleeping bag, occupied.

Sleeping System:

Currently I’m using a Mountain Equipment Xero 550 down sleeping bag which weighs 1.04Kg on my scales. I really could do with a lighter one for the summer. Currently it’s used as a quilt in the warmer weather or paired with an Alpkit bivi bag for sub-zero temperatures.

A Thermarest NeoAir Xlite inflatable mattress (355g) and an inflatable pillow from Decathlon which was stupidly cheap and works really well (81g) finish off my sleep system and altogether they’re extremely comfortable.

Viewranger app with OS map and route tracking running on Samsung Galaxy Note 3.

Other Bits and Pieces:

Those are the key items but obviously there are lots of other things in my backpack. I mainly use Viewranger maps on a Samsung Galaxy Note 3 as a GPS. There’s an mp3 player and headphones to help me sleep if a campsite’s noisy. A spare water carrier (either a 1L or 2L Source collapsable water container), lighter, money, toiletries, etc.

In terms of clothes I take a lightweight Rab waterproof jacket and, if rain is forecast, waterproof trousers. In the summer months I wear a Tiley hat to keep the sun out of my eyes and the rain off my head. In the winter I’ll take a warm hat, gloves, buff, and merino thermal layers. Wet feet on a weekend in Norfolk taught me to always pack a dry pair of socks. Recently I’ve added a cheap pair of cotton shorts to the list to wear inside my tent when my walking trousers are particularly wet and muddy. I also have a Rab insulated down vest that packs down very small and is a real comfort on a chilly evening.

Well there you have it, my kit list. In total it weighs about 6Kg before I add water, food, and fuel for the stove. Definitely not ultra-lightweight but it is on the lighter end of the scale. I’m too fond of my comfort items (mp3 player, tent socks, pillow) to ever get down to ludicrously lightweight so I’m reasonably happy with my reasonably lightweight set-up.


Wild Country Zephyros 1 Tent Review

*** This tent had a failure! Please read blog post Terra Nova Customer Service ***


This is a review of the original Wild Country Zephyros 1. Terra Nova have released an updated version of this tent, the Zephyros 1 Lite, which is slightly lighter (and slightly brighter). I’m posting a review of this original version because…

  1. Terra Nova are still selling it
  2. At the time of writing it’s on sale at Cotswold Outdoor for £99 which is an absolute bargain for an excellent backpacking tent.

Wild Country Zephyros 1 pitched without the inner.

The Zephyros 1 is a solo 3-season backpacking tent.

It’s an almost direct copy of Terra Nova’s successful Laser Competition 1 and is made by the same company (Wild Country are a cheaper range made by Terra Nova). However there are a few major differences.

  • It’s made from cheaper, heavier materials. Terra Nova claim a packed weight of 0.93Kg for the Laser Comp and 1.57Kg for the Zephyros.
  • The Zephyros comes fully seam-sealed, the Laser Comp needs to be seam-sealed by the customer.
  • The pole sleeve is attached to the tent, unlike the Laser Comp where it’s separate, and this makes it easier to pitch.
  • The Laser Comp costs £330 and the Zephyros 1 costs £120.

I bought mine last year and it’s my go-to tent for the colder, wetter months when I’m solo backpacking. In terms of space I find it tall enough to sit up in (I’m 5’6″) and there’s plenty of room to sleep and cook.

I’ve not found condensation a problem. The inner door is half mesh and there are small mesh panels on the inner at either end. The porch has a 2-way zip so you can open a ‘window’ at the top if extra ventilation is needed (although obviously not when it’s raining).

The porch isn’t massive but there’s room to cook inside. Note: cooking in tents can be very dangerous, not just because of the potential for combining fire and highly flammable fabrics but also the danger of carbon monoxide poisoning. I’d advise against using a stove inside a tent unless you have lots of ventilation, are very cautious, and are experienced with the stove you are using. Always have a plan.

The second time I pitched this tent I did it in the dark, in the rain and managed it without too much swearing. Compared to some backpacking tents, where getting the sides taut is an art-form, this is pretty easy. There’s one big pole that goes over the middle and 2 short end poles. The tent comes with the end poles left in when the tent is packed away but I remove them and store them with the main pole. That way the fly & inner can be squished down to a much smaller size without the end poles getting in the way.

I haven’t pitched this tent up a mountain in 50 mph winds but it’s been out in heavy rain and reasonable coastal winds and it’s held tight, no problems or leaks.

The colour is an advantage when wild camping as it’s not too lurid.

My Zephyros 1 on the Isle of Wight Backpacker’s Club trip.


Modifications:

A very easy mod is to swap the guy ropes for lightweight dyneema and mini line-loks. There are only 4 guy ropes on the tent so it doesn’t make a great different to the weight but at the same time it’s not a big job to do.

Carry lighter tent pegs. My set includes some light v-shaped pegs that came with a Nemo tent and some titanium ‘ti-pins’. The Zephyros uses 10 tent pegs when completely pitched.

Lose the stuff sacks if you don’t need them.

The door doesn’t stay open very easily with the in-built catches so a peg or clip is useful.

Door held open with clip.


Summary:

A great, cheap tent in a popular, well-tested design. Ideal for a solo hiker on a budget.

It’s hard to find fault with this tent. Although it’s a little heavy for a solo tent compared to some other tents on the market it’s a third of the cost. (The set-up I have weighs 1.4Kg not including the pegs.) It’s very sturdy and the Pu Polyester feels stronger than Si Nylon. Not having to seam-seal a tent is a real advantage. A little more room would be nice but there’s plenty of space for one. I only paid £99 for mine and I really feel like I got a bargain. This is a tent I have confidence that I’ll be comfortable in.

Extra option:

Today I pitched the Zephyros without the inner. This tent will pitch with just the fly but the end poles could sink into soft ground. Nick Miles, chairman of the Backpacker’s Club, has suggested using the tops of milk cartons to keep this from happening. In this config, counting just fly sheet and poles, the tent weighs 835g.

Without the inner the end poles could sink into soft ground.


Full Specs:

  • Sleeps: 1
  • Season Rating Spec: 3 season backpacking
  • Free standing?: No (tent requires guy lines to be pitched)
  • Minimum Weight: 1.41Kg (3lb 2oz)
  • Packed Weight: 1.57Kg (3lb 7oz)
  • Pitch Time (estimate): 5 mins
  • Number of Porches: 1
  • Number of Doors: 1
  • Pitch Type: Fly and Inner pitch together
  • Pack Size: 52cm x 14cm
  • Flysheet: Pu Polyester R/S 4000mm FR
  • Floor: Pu Polyester R/S 6000mm
  • Poles: 8.5mm Wild Country Superflex Alloy
  • Peg: 10 x Aluminium V-Angle
  • Guylines: 4 x black reflective 2.3mm
  • Inner Door: Half Mesh

Dimensions

Good tents attract small dogs and sunsets…

Using The Pocket Stove as a Wood-Burner

Today I did a brief test of The Pocket Stove from backpackinglight.co.uk as a wood-burning stove.

The Pocket Stove laid flat, storage tin, and a 10p for size comparison.

This is the first time I’ve used a wood-burning stove. We usually use a Primus ETA express gas stove. The Pocket Stove was obtained to provide an alternative multi-fuel stove.

The blurb:

A flat pack, clip together multi fuel cooking stove. The adjustable platform offers two burn heights, the top slot for esbit/hexamine tablets and the other for organic matter and pop can stoves.

Weight: 141g (195g in tin)

This is my second attempt to test the Pocket Stove. The first attempt, in the depths of winter on a cold and windy day, failed completely. My lasting impressions from this original test were…

A) When it’s very cold and windy using a wood-burning stove is a very silly idea.

B) Knocking the pan of water off the top of the stove just as it’s boiling is also a very silly idea.

It’s worth noting here that a heat-exchanger pot (with a crinkly bottom) doesn’t sit easily on top of the Pocket Stove. My original test was with the pot from the ETA Express. This second test was done with a much more stable, smooth-bottomed titanium MSR kettle.

I managed to boil a cup’s worth of water using little twigs (of about pencil thickness) that I’d gathered and dried for the task.

Safety – The stove gets extremely hot. It’s impossible to touch it when the fire’s burning and for a fair while afterwards. Small hot embers fall through the bottom on the stove onto the ground. Without a durable heat-proof surface the ground (or whatever your cooking on) will be burnt.

Convenience – Wind blows ash out of the stove onto and around everything nearby. When finished there are a little pile of burnt out sticks (and whatever else you used to start the fire) to deal with. The pot and stove are covered in sticky soot that’s tricky to wash off even with washing up liquid, hot water, and a scrubbing pad.

Time – I didn’t time how long it took but at a guess it took about 20 minutes to boil the water. I’m sure that I can get quicker with practice but obviously, slower than gas.

Skill – I had pretty much ideal conditions for the test. The wood I had was bone dry. I had a large number of long matches and newspaper to hand (and a bucket of water in case I set fire to myself). The temperature was mild and the wind slight, just enough of a breeze to fan the flames but not put them out. Even so, it’s not a walk in the park to get a good little fire going and to keep it going long enough.

Stealth – This is not a stealthy way to cook food. It makes a lot of smoke and it smells. There’s ash floating around too. Not ninja.

Fun – This is a lot of fun! There’s something about gathering your own fuel, for free, from the natural world, which is satisfying. Our natural love of cooking fires, the warmth and light, sound and smells, kicks in even with this tiny stove. Then the concentration and skill to light and keep the fire burning adds another dimension of enjoyment to cooking.

I made this!

The Aftermath.

In summary, I think this is a really fun piece of kit but cooking with wood is probably more of a novelty than a practical cooking solution. Next up, a test with a hex tablet.

From backpackinglight.co.uk:

Specifications:

  • Max Height: 10cm
  • Max base width: 7.5cm
  • Sq plate: 7cm x 7cm

Weights:

  • Side Panel: 31g x 2
  • Back Panel: 31g
  • Door: 26g
  • Square Base: 22g
  • Total: 141g
  • Storage Tin: 54g
  • Packed Total: 195g

Will it fit your pop can stove?

  • Height 100mm
  • Base Plate 68mm sq
  • Upper Aperture 61mm sq
  • Lower Aperture 72mm sq

The Pocket Stove was designed and manufactured entirely in the UK by backpackinglight.co.uk

The Winter Months

I have a confession to make… I’m a 3-season outdoor enthusiast.

Brrr.

I don’t mean that I won’t walk on a cold and rainy day, far from it. At the moment I’m waiting for some decent rain to try out my new bargain Quechua waterproof. It’s just that from December through to March I’m not going walking or camping or backpacking. It just doesn’t happen. An hour’s walk a day with the dogs around the woods in slush, ice, and freezing temperatures is enough for me. Quite honestly, the dogs don’t want to go outside at all.

Walkies? Ok, I’ll be right behind you.

Partly this is because I feel the cold more than others and have to make extra provision to ensure I don’t have a Raynaud’s attack when out in it. If I’m wearing the right clothes and moving swiftly I’m fine but if I get caught-out then a pleasant walk can quickly become a miserable experience.

Knitting output increased as temperatures dropped.

The main reason I don’t do much outdoorsy stuff in the winter though is it’s a great excuse to stay indoors and indulge my other main hobbies, knitting and gaming. This winter I knitted two jumpers, numerous socks and hats, and played stupid amounts of Borderlands 2 with my husband and it was great! I felt justified closing the curtains, putting my feet up, and just enjoying being at home.

Adventuring from the comfort of my own armchair.

Now spring has (finally!) arrived the outdoor bug’s returned with a vengeance. Fresh shiny issues of TGO landing on the mat have me dusting off my backpack and checking my tent over. Maps are being examined, routes are being planned, holiday days booked. Yay for spring!

Photo by Neville Fenn.

Berkshire backpack – Uffington to Lambourn.


Back in 2010 I heard about the Backpacker's Club and joined. It seemed obvious to combine two of my favourite activities, walking and camping. 2011 saw us making plans but we got a puppy which grounded us until he was tent trained. All the time I kept reading of backpacker's adventures in the club magazine. Daydreaming of getting outdoors with everything needed for an adventure in my rucksack.
 

This year I was determined to make it happen. Unfortunately the club didn't have any events in my neck-of-the-woods that I was free to attend. Searching for inspiration I asked on the forum. Tony Wilson and Darren Tipper suggested the Uffington to Lambourn weekend David Topley had put together in 2008. It looked perfect. Not too far between the campsites (7 miles), easy walking along the downs, and with ancient monuments on the way.

Talking about my plans on the club's Facebook page generated a fair bit of interest for exactly the same reason I'd not been able to make a club meet, not much on in the South East in June. So, from just an idea, all of a sudden my Berkshire backpack was an official club event. My first backpack and my first club meet. What had I done?! However, after emailing the local county liaisons, and Tony, and Darren, I received so much support in reply that my fears were allayed. Also using David's weekend as a basis for mine made it very easy to arrange.

In preparation, my husband, our two dogs, and I did a few training walks. Packing our Lightwave Wildtrek rucksacks with our lightest tent and everything we thought we'd need. Surprisingly it was easy to carry the load, probably because our rucksacks are so well designed. Thanks to blogpackinglight for the review that sent us in Lightwave's direction.

 
Before I knew it, it was Friday the 22nd of June and we were driving to Uffington. Rather than using the motorway we took the scenic route through Streatley and Wantage. It was a beautiful evening and a lovely drive. We arrived at Britchcombe Farm to find everyone already pitched and friendly greetings were exchanged. Geoff Gadsby had been knocked over by a car walking to the site but was okay apart from a few scrapes and a sore wrist. The car only stopped to make sure he was still moving before driving off! He'd pitched his tarptent at the bottom of the hill out of the wind. The rest of us braved the cold wind in the top field and we all enjoyed the beautiful sunset.
 
 
Britchcombe Farm's a surprisingly big site with multiple fields, portaloos, water taps, and (in most fields) campfires allowed. Up at the farm there's a washing up area and a shower and I saw a sign for teas. It was £7 per person (which I collected & handed in Friday night) and we were allowed to leave the cars Saturday night for a small donation to their favourite charity. The best bit is their proximity to the Ridgeway although the footpath to get there from the farm is pretty vertical!
 
 
Saturday morning dawned bright and clear with sunshine. Geoff Gafford arrived early to join us and we packed up and, in a number of small groups, headed South towards the Ridgeway and Uffington's White Horse. It was perfect walking weather. A cool breeze, sunshine and intermittent light showers. My husband, Nev, and I stopped at Waylands Smithy for a bite to eat after wandering around Uffington Castle and admiring the view North from the White Horse.
 
 
We took a footpath South, West of the Lambourn Downs Way path. Unfortunately the path disappeared under waist high crops and we ended up having to force our way through for a few kilometers. Exhausting hot work until we reached a small copse of trees where the path became clear again. There we stopped and brewed up some hot chocolate and attacked the jelly babies.
 
 
The way was much easier after that and we made good progress towards Lambourn, meeting friendly locals on foot and horseback on the way. Despite big black clouds and heavy rain in the distance we kept missing the showers and arrived at Farncombe Farm at 3.30pm after walking a total of 10 miles. Anne and Donald were already there enjoying afternoon tea and we pitched our tent nearby and did the same. Later on, after a much longer trek (in some cases including pub and chips), Geoff, Geoff, Grant, Frank, and John arrived too.
 
We were joined at Farncombe by a large group of DoEers. They pitched in another field and were no trouble at all. Liz and her family are terrific. They left their back door unlocked so we could use the house toilet so we wouldn't have to share with the school girls. A very welcoming site and at £4 a night a bargain too. I collected the damage from everyone and took it to SaraJane at the house, who was looking after the campsite for the weekend. Lambourn village is a bit of a trek down narrow country roads 2km away so we all settled in for the night and, as it got dark, the rain and wind arrived. Luckily the hatches were battened down. Grant was under his green handkerchief but was still there in the morning, along with a little group of black beetles who'd decided his tarp was the best place to shelter during that wild night.
 
 
Sunday morning, just in time for breakfast, the weather cleared up and we all headed off together, taking the most direct route back to Uffington. Once again it was a clear day with great visibility, windy with dramatic dark clouds on the horizon that we never caught up to. We walked along the gallops on the Lambourn Valley Way. Stopping for a snack in a lovely grassy spot where Don found the perfect sitting stone. Eventually we strung out as everyone walked at their own pace enjoying the fresh air and long views.
 
By lunchtime we were back at Britchcombe Farm picking up the cars and saying our goodbyes. It was such an enjoyable weekend I immediately decided to do it again as soon as possible. I can't thank the attendees enough and the other club members who offered advice and support for my first meet. Extra thanks go to Donald Betts who picked up Anne Ling at short notice when her lift fell through. It wouldn't have been the same without her. Backpackers are an easy-going and independent lot so it's very simple to arrange a meet. Low maintenance! I urge anyone whose thinking of having a go to do it, especially if you're in the South of England 😉
 
 
More photos here.


Nemo Meta 2P Tent Review

Nemo Meta 2P - cooking in the porch

(Photo by Grant Currin)

Recently we realised that, although our Wild Country Duolite Tourer is an excellent tent, we didn’t have a tent that was light enough for one of us to carry on a solo backpack. The Duolite Tourer weighs 2.95kg, has a reasonably large pack size, and has another disadvantage. With just one exit from the inner and a narrow tunnel shape, getting up requires the other occupant to also be awake (or at least be prepared to be trodden on in the middle of the night).

We were fairly settled on getting a Mini Peak II because of its low weight (1.48kg with the 1-man inner), twin entrances, and large internal size (5.25m2). However it’s only available with the 1-man inner for now and the square based prism shape, with a single apex held up by a single trekking pole*, might be impractical for two.

Having a final scout around I stumbled upon the Nemo Meta 2P.

The Nemo Meta 2P is a lightweight two-man tent held up with 2 trekking poles. On our digital scales at home the Meta weighs 1.55kg including dry-bag stuff-sack, tent pegs, and peg bag (excluding tags

)

The Meta is a hybrid between a tarptent (single-skin) and a tent with an inner. Two sides are single-skin and the front and back have no-see-um (insect proof) mesh between the sleeping compartment and the doors. To combat condensation two long vents run down the sides with another two on each end.

Both front and back have identical entrances and vestibules so both occupants have their own storage space and door. So in the middle of the night when one person needs the loo they don’t have to disturb the other. The sewn-in bucket groundsheet covers just the sleeping area leaving the vestibules free to store wet/muddy gear separately. Total floor area is 5.5m2, 3.5m2 in the sleeping area and 1m2 for each porch.

Another helpful design aspect of this tent is that the trekking poles tilt forward a little over the end of each porch so, when the door’s open, the overhang mostly keeps the rain out. Making it easier to cook in wet weather. In good weather, both sides of each vestibule can be opened up and tied back, on each end. Which mimics the closer-to-nature feel of a tarp but with the added insect protection of the mesh.

Having two trekking poles, rather than one like the Mini Peak II or Golite’s Shangri-La 3, means there are two internal points of maximum height. The tent isn’t as tall inside as the SL3 or MPII (only 109cm) but it does allow each person to sit under an apex. Also the highest points are at the entrances/porches which is where you need the height to get in and out of the tent more easily. Also it seems to me that two poles are more stable.

Nemo are an American company but, unlike some American tents, the Meta is available through UK suppliers and is already seam-sealed.

Last weekend I took the Nemo away to Dartmoor and it performed fantastically in wind and rain. Luxurious space for one. The 2 porches were perfect for storing wet gear, muddy boots, and still having space to make dinner. There was some condensation on the cold night but nothing terribly impractical, a quick mop around with a microfibre towel sorted that out. I wouldn’t recommend it for anyone significantly taller than me (5’6″) as the sleeping compartment isn’t very long. The dry-bag stuff-sack was very useful Sunday morning to pack away the wet tent for the journey home. Another thing I appreciated was the coloured cord attached to the tent pegs, which were easy to find in the long grass.

All in all, it’s a joy finding a Nemo in your backpack at the end of a day out walking.

Nemo’s website


Few more specs:

Capacity 2P
Minimum Weight 2 lbs, 15oz / 1.3 kg
On the Fly Weight N/A
Trail Weight 3 lbs, 9 oz / 1.5 kg
Floor Dimensions 96 x 53 in / 244 x 135 cm
Floor Area 37 sq ft / 3.5 sq m
Vestibule Area 22 sq ft / 2 sq mm
Interior Height 43 in / 109 cm
Number of Doors 2
Frame Description 2 Trekking Poles or Meta™ 2P Pole Set
Packed Size 5 x 7 in / 13 x 18 cm
Shell Fabric 20D PU Nylon
Vestibule Fabric 20D PU Nylon Ripstop
Fly Fabric 20D PU Nylon Ripstop
Canopy Fabric N/A
Floor Fabric 30D PU Nylon Ripstop (5000mm)
Color Birch Leaf Green

Screen Shot 2013-08-20 at 11.43.51

Confirmed by email Aug 2013:

“The Meta 2p tent has 1500mm of waterproofing on the tent body, and 5000 on the floor.
Oliver Fisher
Customer Service Representative NEMO Equipment, Inc.”

Update June 2014 – Pitching:

Set your trekking poles to 125cm. Start by pegging out the 4 corners of the groundsheet, diagonals first, ensuring that the guys are long so they can be shortened later if needed. Then, with the doors zipped closed, add the trekking poles and peg out the 2 porches. To do this adjust the black tape so it’s as long as possible on the vertical line between the peg and the door and ensure the horizontal black tape is lying relatively taut on the ground and is in line with the tent roof. It’s okay if there’s a large gap  between the doors and the ground. (If you try to reduce this gap the tent will deform and be slack in all the wrong places. I believe it’s designed this way to create good air circulation through the vents and hence reduce condensation.) Finally guy out the two side vents. Sticks or an extra set of trekking poles can be used here to lift the sides of the tent to give more head/foot room inside. After an hour or so, if the tent has stretched, you can tighten up the guy lines.  In total the tent uses 8 tent pegs. I’ve switched out 6 for lighter Ti-pins but still use the original v-shaped pegs for the two porches. If it’s windy it can be worth using 2 pegs in each porch guy point to ensure they are secure.

* The idea being that you’ll be carrying trekking poles anyway so they might as well be used to hold up your tent, saving the weight of a tent pole in your backpack.

Camping: Tent Review: Vango versus Quechua… Fight!

On our last camping trip we used the Vango Orchy 500 as our main tent with a Quechua Base Seconds Full as a separate kitchen/utility tent. This was spacious and convenient but pitching and packing away was a pain. In total it took 3 hours to dismantle and pack away camp and an hour of that was just packing away the Vango. In comparison it took just minutes to put away the Quechua.

3 hours is a long time when you have to be off a pitch by 11am. The longer it took the more tired we became and the slower we moved. We made it by 11 but were shattered and facing a long drive home.

Since then I’ve been thinking, is it worth taking the Vango? I love the size of the Vango, it’s massive. It’s well designed. The windows make it feel spacious and light. It’s withstood gale force winds and rain storms. However if it’s raining you can’t have the doors open and it’s a labour intensive, slow job to pitch it and pack it away. The tent’s still sitting in our garage waiting to be dried out because it’s so big we need a really dry day to get it out on the lawn.

When we arrived at our pitch it was poaring down with rain. We’d been driving for 5 hours with the dogs in the car. We all needed to get some fresh air, stretch our legs, and have a drink before even thinking about pitching the Vango. So we grabbed the Quechua out of the car and popped it up. Within 10 minutes we were sheltered from the rain with the kettle on.

Using the Quechua Base Seconds Full with our 2 Seconds III attached makes a similar tent design as the Vango (one porch plus one sleeping area). I used this set up when I went camping earlier in the year (see photo above). It’s a much smaller living space and the two tents aren’t actually attached to each other. Also they both take up more room in the car than the Vango.

However they are _much_ easier to pitch and pack. We could have camp set up in minutes rather than hours. The lack of space could be helped by adding a 2 Seconds I (£25) as a storage tent (or perhaps even our Wild Country Duolite Tourer) to the 2nd tent attachment point. Another advantage is these tents are much more convenient to dry when you get home. With the modular system you can dry one tent at a time by just popping it up in the garden for half an hour.

We could, of course, sell the Vango and replacing it with a quick-to-pitch alternative. Like Vango’s new Velocity 400 (£415) or Quechua’s Seconds Family 4.1 (£180). However this is a more expensive option and isn’t as flexible as a modular system of three smaller tents.

For our next trip, we’ll use the Quechua tents instead and see if we can cope with sacrificing a bit of space in exchange for less back-breaking work.

Links:

Quechua Base Seconds Full review.

Quechua 2 Seconds III review.

Vango Orchy 500 quick review.

Camping: Tent Review: Quechua Base Seconds Full

The Quechua Base Seconds Full is a square pop-up tent with a domical roof, tall enough for an adult to stand upright inside, with 4 doors. It can be used alone, with other Base Seconds tents, or with one or two Quechua 2 Seconds tents.

“A living area with direct access to your 2 seconds.”

There are two doorways plus two entrances designed to allow access to up to two 2 Seconds tents.

The tent comes with an optional groundsheet. A tent inner can be purchased separately which converts the Base Seconds into a bedroom.

Height 190cm x 225cm wide x 225cm long

Quechua claim 4/6 people can sit comfortably round a table inside. Pitching time is quoted as 5 mins and packing away time 2 mins.


We have a Quechua 2 Seconds III that we use for short getaways. We also have a large Vango Orchy 500 for longer trips which has a bedroom and a porch. We decided to get a Base Seconds Full to…

1. Add an optional porch to our 2 seconds III.
2. Give us access to a bigger tent that I can use on my own (the Vango requires 2 people to pitch).
3. Provide a gazebo for use at home in the garden.
4. Add a separate kitchen/storage room to the Vango for longer glamping trips.

I tested the Base Seconds Full over a 2 night solo camp with our 2 Seconds III.

Pros

Quick and easy to pitch even for a solo camper. Once you know the technique and have had a little practice I agree it takes 5 minutes to pitch and 2 to fold away. In my experience that isn’t including guy ropes and tent pegs though. An added bonus is that it’s easy to pop open to dry when you get home.

Great ventilation and shade from the 4 entrances and overhanging roof. If the sun’s on one side of the tent you can close that side up and open the other doors. Each door also has a small netted window that can be used for ventilation without letting in bugs. I had no concerns about using my small stove inside with the doors open due to the tent height and airflow. Excellent flexibility as a sun and light rain shelter.

Practical interior space for living in. I had a camping chair, small table, two dog beds, two dogs, and a bunch of gear in there and used it quite happily as a living room for two days. Being able to stand upright is something I always appreciate. There are a couple of hooks in the ceiling for lanterns etc. I am however dubious about their claim that 4/6 people can eat comfortably around a table inside!

Cons

Very heavy to carry at 9.4kg. The tent in its bag is an awkward shape, big and round. There are straps which help but I wouldn’t want to carry it any distance.

This tent doesn’t do well in high gusting winds. I camped in (at a guess) 25mph winds and hence used all the tent pegs and guy ropes, afraid the tent would be pulled off the ground. However the opposite happened. The high design with overhanging doorways caught the wind and the poles bent so the roof pushed inwards. I sat inside and pushed back each time it happened but I was concerned that in stronger winds something may have torn.

The doorways open almost all the way round with zips. Unless you pitch the tent with even tension in all directions they’re fiddly to open and close.

The 2 Seconds tent doesn’t attach directly to the Base Seconds Full. There’s just an overhang that protects you from the rain going from one to the other. (Hard to describe but shown in the video.) So four doorway zips need to be undone to get out of the tent at night which, as above, can be extremely fiddly in the dark, when you need a wee, and you’ve forgotten to put on your glasses!

There aren’t any storage pockets inside. I think these would be a really good addition.

(Unable to test the waterproofness as we didn’t have any heavy rain, just a couple of very light showers.)

In summary, the Base Seconds Full is a useful addition to your 2 Seconds for Summer camping. As with all Quechua tents I think they’re a bit optimistic with the dimensions. It’s super easy to pitch and pack and the ventilation’s terrific. I can’t wait for an excuse to use it again!